With the invention of eVisas, visa applications have been easier and smoother in these modern times. Morocco, filled with its colorful culture and breathtaking sceneries, enables travelers to apply for an eVisa online. One step in this regard is uploading all the required documents to support your application. Applying for a Morocco eVisa involves several steps, one of the most crucial being the upload of required documents. Ensuring that you upload the correct documents in the right format is essential for the success of your application.
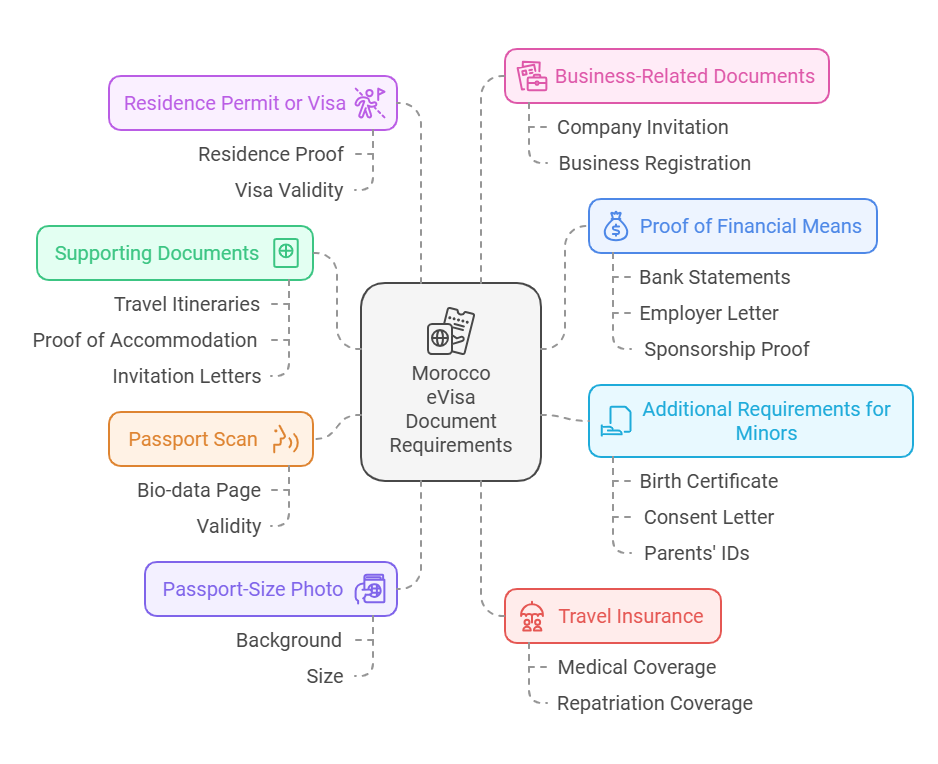
Before beginning the upload process, it is important to know what documents you’ll need. These typically include the following:
A clear scan of the bio-data page of your passport. The passport requirements include:
A recent color photograph meeting Morocco’s specifications.
Depending on the type of visa and purpose of travel, additional documents may include:
Evidence of sufficient funds to cover your stay in Morocco, such as:
Some applicants may be required to provide valid travel insurance covering the duration of their stay in Morocco. Ensure the policy includes medical and repatriation coverage.
For non-citizens applying from a third country, proof of residence or a valid visa for the country where you are applying may be necessary.
For business travelers, required documents include:
If traveling with children or minors, additional documents include:

Always verify the exact list of required documents on the official Morocco eVisa application portal, as requirements may vary based on nationality and purpose of travel. Preparing and uploading these documents accurately can save you time and ensure a smooth application process.
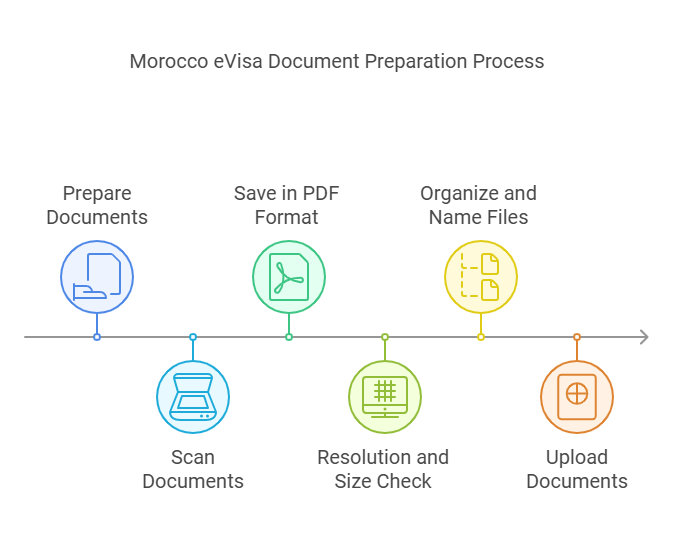
To ensure smooth uploading, prepare your documents as follows:
Scanning and digitization of your documents is a very critical process in the Morocco eVisa application. Here is a step-by-step guide on how to scan and digitize your documents for the Morocco eVisa application.

Follow these steps to upload your documents during the application process:
Step 1: Access the eVisa Portal : Log in to the official Morocco eVisa application portal. Begin or continue your application form.
Step 2: Navigate to the Upload Section : Look for the section labeled “Document Upload” or “Required Documents.”
Step 3: Select the Document Category: Choose the appropriate document category (e.g., Passport, Photo, Supporting Documents).
Step 4: Upload Your Files: Click on the “Upload” button. Select the file from your device. Wait for the upload to complete.
Step 5: Confirm Upload: Review the uploaded file for clarity. Confirm that the correct file has been uploaded.

Here are common issues applicants face and how to resolve them:
|
Error |
Solution |
|
File Size Exceeds the Limit |
Use an online file compressor or resizing tool to reduce the file size without compromising quality. |
|
Invalid File Format |
Convert your file to an accepted format (e.g., JPEG to PDF) using file conversion software. |
|
Upload Failed |
Check your internet connection, refresh the page, and try again. |
|
Document is Not Clear |
Rescan the document, ensuring proper lighting and resolution. |
To avoid delays or rejections, follow these best practices:
If you continue to face difficulties uploading documents:
Ensuring your uploaded documents are received is an important step in completing your visa application. Here's how to confirm:
Before submitting your application, double-check:
Once all documents are uploaded and the application is submitted:
What documents do I need to upload for an eVisa in Morocco?
You have to upload the scanned copy of your passport, a passport photo, and some additional documents: the travel arrangement or hotel booking or invitation letter.
In what format is a document to be uploaded?
Most often, it is PDF, JPEG, and PNG taken in the Morocco eVisa. Please note that the document must be converted into one of these formats before uploading.
What is the maximum size of a file per document?
The normal size limit is 2MB per document. If your file is larger than the size limit, then you may use an online tool to either compress or resize without losing its quality.
How do I know whether my documents were uploaded successfully?
A confirmation email will be sent to the applicant after uploading. They can also log in to the eVisa portal to confirm the receipt of the documents.
Can I replace or edit the documents after uploading them?
Yes, you can replace or edit the documents before submitting the final application. Log in to the portal, go to the document section, and upload the updated files.
What if my document is blurry or unclear?
If it is blurry, try rescanning it in better light and higher resolution (at least 300 DPI). The text should be clear, and the image shouldn't be cropped.
Do I have to scan both sides of my passport?
Yes, if both sides of your passport have information-such as a visa or stamps-record and upload a scan of the pages for proper capturing of information.
Content Disclaimer: While this information was last updated in January 2025, we strongly suggest confirming all travel details with the appropriate governmental agencies, embassies, and airlines.
Step1: Complete the online application by entering your passport details.
Step2: Make the payment online using a credit card.
Step3: Check your email for the payment confirmation and receive your e-visa.